Monday, March 3, 2014

Speed Cleaning

I have not been working the past two weeks and I am preparing to return to work with a former employer on Tuesday. During the past two weeks I have been doing major cleaning and organizing around the house to make life easier. I was inspired to clean and organize my own home after spending some time cleaning, purging and organizing at my parents home.  My Mom was diagnosed with frontal lobe dementia in the spring and before her diagnosis she spent most of her time purchasing items that she has never used and my Dad was unaware that this was happening (that is a post for another day).  The house is not at the stage of a hoarder, but every nook and cranny of  that house is filled with unnecessary stuff that is not being used or will never be used.
Mom likes books, especially self help books.  Dieting books and cleaning  books have her book shelves overflowing. This is a sampling of some of the cleaning and organizing books that I brought into my house hoping to help me kick the clutter habit.
 I started to read some of these books and was becoming discouraged because some of the actions they suggest are ridiculous, time consuming and not made for real people.  However, what I did take away was cleaning for 15 minutes.  I fall into the excuse trap of saying I do not have enough time to do this or that.  I did take away a helpful hint that does work. It involves setting a timer for 15 minutes and working on a small project such as a drawer or cabinet for 15 minutes and then stopping when you hear the timer.  You stop whether or not you have completed the task.  If you have additional time to complete the task, set the timer for another 10 or 15 minutes and work some more, but do not continue without an end time.  It is amazing how motivating and rewarding this type of cleaning can be.  It makes cleaning a game of beat the clock. This method is very helpful if you are prone to "Cleaning ADD", the affliction where you go from room to room starting projects and never finishing any (I am sure I am not the only person with this affliction). This simple rule allowed me to organize my china cabinet catch all cabinets, home to glass ware and miscellaneous junk. The photo may not be magazine worthy, but is a huge improvement.
  BEFORE
AFTER

This is a cabinet in the kitchen that is home to craft supplies, coloring books, candles and my address book.  My children have not opened a coloring book in seven years, but I had about twenty-five stashed in this cabinet with a container filled with thousands of crayons.  Cleaning these two cabinets took less than forty-five minutes, but I had been putting it off because I never had "enough time".  I also cleaned my linen closet and organized the bathroom cabinets, each taking less than 30 minutes
BEFORE
AFTER

 Getting rid of the clutter gives you a feeling of control. It may not surprise you, but now my family can find any item they want.   Keep your kitchen timer handy and get to work! You will be amazed at what you can accomplish. I tried this method on my children and it worked for them also.  This could be the miracle cure for our messiness.

Wednesday, February 26, 2014

Quinoa Granola Bars

I am guilty of getting caught up in the latest health food kick and purchasing the largest quantity possible of that ingredient at my local Costco.  After a few weeks the newness of the item wears off and then I am stuck with an ingredient that either my family or myself is not crazy about or I have to find a new way to use.  Quinoa is a grain that I have heard great things about and it is high in protein and fiber.  My family is not in love with it yet, but we are working on it.  I have been searching for recipes to utilize my Costco purchase and the following recipe is what I found.   honestlyyum.com/8346/quinoa-granola-bars/
Of course I did not have all the ingredients available in my pantry and did not feel like braving the Polar Vortex to find them at the market, so I improvised to accommodate the ingredients in my pantry.

I used quinoa, oatmeal, honey, chia seed, coconut oil. Yes, the chia seed and coconut oil were also some fad foods I have purchased. I obviously was cleaning out the pantry.


Preheat your oven to 350F. Toast the quinoa, chia seeds and oats in a pan over medium heat until it has a nice fragrance. Cool and combine with nuts, dried cranberries and coconut in a large mixing bowl.


In a small sauce pan, combine honey, peanut butter and coconut oil and heat until melted. Pour over dry ingredients and fold until coated.
Line a 9x13 pan with parchment paper and pour mixture into the pan and press down evenly.  Bake for 25-30 minutes or until edges are toasted.


After removing from the oven, sprinkle with chocolate chips and let sit until chips are melted.  

Spread melted chocolate chips with a spatula to cover the entire pan. Sprinkle with sea salt.


Cool in pan until chocolate is set and cut into 24-30 bars.  These can be frozen in snack bags and thaw in lunches. These granola bars received rave review from my husband and daughters.  I was shocked to say the least.

Quinoa Granola Bars

1/2 cup honey
1/4 cup coconut oil
1/3 cup peanut butter
3/4 cup chopped peanuts (any nut of your choice)
3/4 cup slivered almonds
1 cup of coconut flakes (I used sweetened because it was what I had)
1 cup of dried cranberries or cherries (I used cranberries)
2 cups of oats (I used old fashioned)
1 cup of uncooked quinoa, rinsed and dried
1/2 cup of chia seeds
1/2-3/4 cup chocolate chips
Sea salt

Preheat oven to 350F.  Toast quinoa, oats and chia seeds in a pan over medium heat until fragrant. Cool and combine with nuts, coconut and dried fruit. Combine honey, peanut butter and coconut oil and heat until melted. Pour honey mixture over dry ingredients and fold to combine until coated. Line a 9x13 pan with parchment paper and pour mixture into pan evenly and flatten. Bake 25-30 minutes or until toasted at edges. Immediately sprinkle with chocolate chips and allow chocolate to melt.  Spread chocolate with an offset spatula to cover entire pan.  Sprinkle with sea salt and allow to cool until chocolate sets.  Cut into 24-30 bars.

Sunday, February 2, 2014

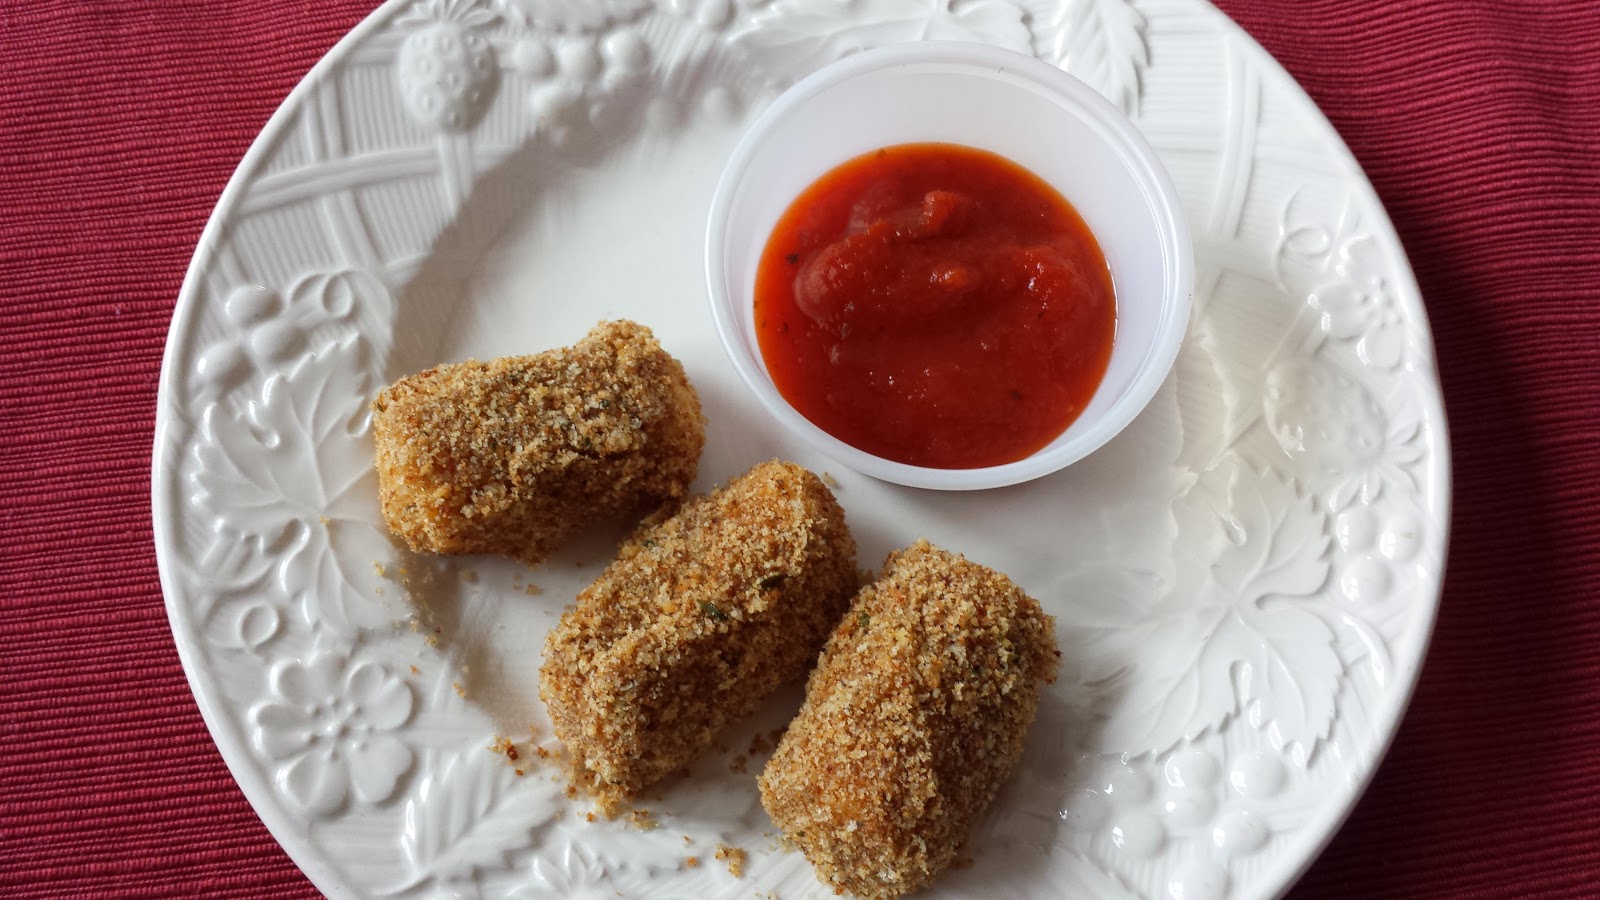
Baked Mozzarella Bites


I recently saw a recipe for baked  mozzarella sticks and decided to try it.  Who doesn't love melted cheese? This is a great appetizer for drop in guests or a satisfying snack when you get a little hungry during a "Polar Vortex". This recipe can be made low fat and gluten free. Feel free to experiment with your favorite crumbs and spices.


These three ingredients plus an egg.  It does not get easier than that.

Mix the bread crumbs with the oil and place in a 350F oven for 5-10 minutes to brown.  Stir occasionally.  This crisps the bread crumbs and will make the outside of the cheese brown and crispy.

Cut the string cheese into thirds.
Dip in beaten egg and roll in bread crumbs to cover; repeat.
Place on foil lined baking sheet and bake 10-15 minutes.
Serve with warm marinara sauce. Yum!

Baked Mozzarella Bites

6 string cheese sticks (unwrapped and cut into thirds)
1 cup of Italian bread crumbs
1 Tablespoon canola or olive oil
1 egg beaten
1/2 cup of marinara sauce

Mix bread crumbs and oil in a small oven proof dish.  Bake for 5-10 minutes at 350F until brown, stir occasionally. Dip pieces of cheese into beaten egg, coat with bread crumbs; repeat.  Place on foil lined baking sheet.  Repeat with remaining cheese.  Bake for 10-15 minutes at 350F.  Serve with warm marinara sauce for dipping.

*Can be prepared ahead and refrigerated on baking sheet until ready to bake.
*Low fat string cheese can be substituted