Monday, March 3, 2014

Speed Cleaning

I have not been working the past two weeks and I am preparing to return to work with a former employer on Tuesday. During the past two weeks I have been doing major cleaning and organizing around the house to make life easier. I was inspired to clean and organize my own home after spending some time cleaning, purging and organizing at my parents home.  My Mom was diagnosed with frontal lobe dementia in the spring and before her diagnosis she spent most of her time purchasing items that she has never used and my Dad was unaware that this was happening (that is a post for another day).  The house is not at the stage of a hoarder, but every nook and cranny of  that house is filled with unnecessary stuff that is not being used or will never be used.
Mom likes books, especially self help books.  Dieting books and cleaning  books have her book shelves overflowing. This is a sampling of some of the cleaning and organizing books that I brought into my house hoping to help me kick the clutter habit.
 I started to read some of these books and was becoming discouraged because some of the actions they suggest are ridiculous, time consuming and not made for real people.  However, what I did take away was cleaning for 15 minutes.  I fall into the excuse trap of saying I do not have enough time to do this or that.  I did take away a helpful hint that does work. It involves setting a timer for 15 minutes and working on a small project such as a drawer or cabinet for 15 minutes and then stopping when you hear the timer.  You stop whether or not you have completed the task.  If you have additional time to complete the task, set the timer for another 10 or 15 minutes and work some more, but do not continue without an end time.  It is amazing how motivating and rewarding this type of cleaning can be.  It makes cleaning a game of beat the clock. This method is very helpful if you are prone to "Cleaning ADD", the affliction where you go from room to room starting projects and never finishing any (I am sure I am not the only person with this affliction). This simple rule allowed me to organize my china cabinet catch all cabinets, home to glass ware and miscellaneous junk. The photo may not be magazine worthy, but is a huge improvement.
  BEFORE
AFTER

This is a cabinet in the kitchen that is home to craft supplies, coloring books, candles and my address book.  My children have not opened a coloring book in seven years, but I had about twenty-five stashed in this cabinet with a container filled with thousands of crayons.  Cleaning these two cabinets took less than forty-five minutes, but I had been putting it off because I never had "enough time".  I also cleaned my linen closet and organized the bathroom cabinets, each taking less than 30 minutes
BEFORE
AFTER

 Getting rid of the clutter gives you a feeling of control. It may not surprise you, but now my family can find any item they want.   Keep your kitchen timer handy and get to work! You will be amazed at what you can accomplish. I tried this method on my children and it worked for them also.  This could be the miracle cure for our messiness.

Wednesday, February 26, 2014

Quinoa Granola Bars

I am guilty of getting caught up in the latest health food kick and purchasing the largest quantity possible of that ingredient at my local Costco.  After a few weeks the newness of the item wears off and then I am stuck with an ingredient that either my family or myself is not crazy about or I have to find a new way to use.  Quinoa is a grain that I have heard great things about and it is high in protein and fiber.  My family is not in love with it yet, but we are working on it.  I have been searching for recipes to utilize my Costco purchase and the following recipe is what I found.   honestlyyum.com/8346/quinoa-granola-bars/
Of course I did not have all the ingredients available in my pantry and did not feel like braving the Polar Vortex to find them at the market, so I improvised to accommodate the ingredients in my pantry.

I used quinoa, oatmeal, honey, chia seed, coconut oil. Yes, the chia seed and coconut oil were also some fad foods I have purchased. I obviously was cleaning out the pantry.


Preheat your oven to 350F. Toast the quinoa, chia seeds and oats in a pan over medium heat until it has a nice fragrance. Cool and combine with nuts, dried cranberries and coconut in a large mixing bowl.


In a small sauce pan, combine honey, peanut butter and coconut oil and heat until melted. Pour over dry ingredients and fold until coated.
Line a 9x13 pan with parchment paper and pour mixture into the pan and press down evenly.  Bake for 25-30 minutes or until edges are toasted.


After removing from the oven, sprinkle with chocolate chips and let sit until chips are melted.  

Spread melted chocolate chips with a spatula to cover the entire pan. Sprinkle with sea salt.


Cool in pan until chocolate is set and cut into 24-30 bars.  These can be frozen in snack bags and thaw in lunches. These granola bars received rave review from my husband and daughters.  I was shocked to say the least.

Quinoa Granola Bars

1/2 cup honey
1/4 cup coconut oil
1/3 cup peanut butter
3/4 cup chopped peanuts (any nut of your choice)
3/4 cup slivered almonds
1 cup of coconut flakes (I used sweetened because it was what I had)
1 cup of dried cranberries or cherries (I used cranberries)
2 cups of oats (I used old fashioned)
1 cup of uncooked quinoa, rinsed and dried
1/2 cup of chia seeds
1/2-3/4 cup chocolate chips
Sea salt

Preheat oven to 350F.  Toast quinoa, oats and chia seeds in a pan over medium heat until fragrant. Cool and combine with nuts, coconut and dried fruit. Combine honey, peanut butter and coconut oil and heat until melted. Pour honey mixture over dry ingredients and fold to combine until coated. Line a 9x13 pan with parchment paper and pour mixture into pan evenly and flatten. Bake 25-30 minutes or until toasted at edges. Immediately sprinkle with chocolate chips and allow chocolate to melt.  Spread chocolate with an offset spatula to cover entire pan.  Sprinkle with sea salt and allow to cool until chocolate sets.  Cut into 24-30 bars.

Sunday, February 2, 2014

Baked Mozzarella Bites


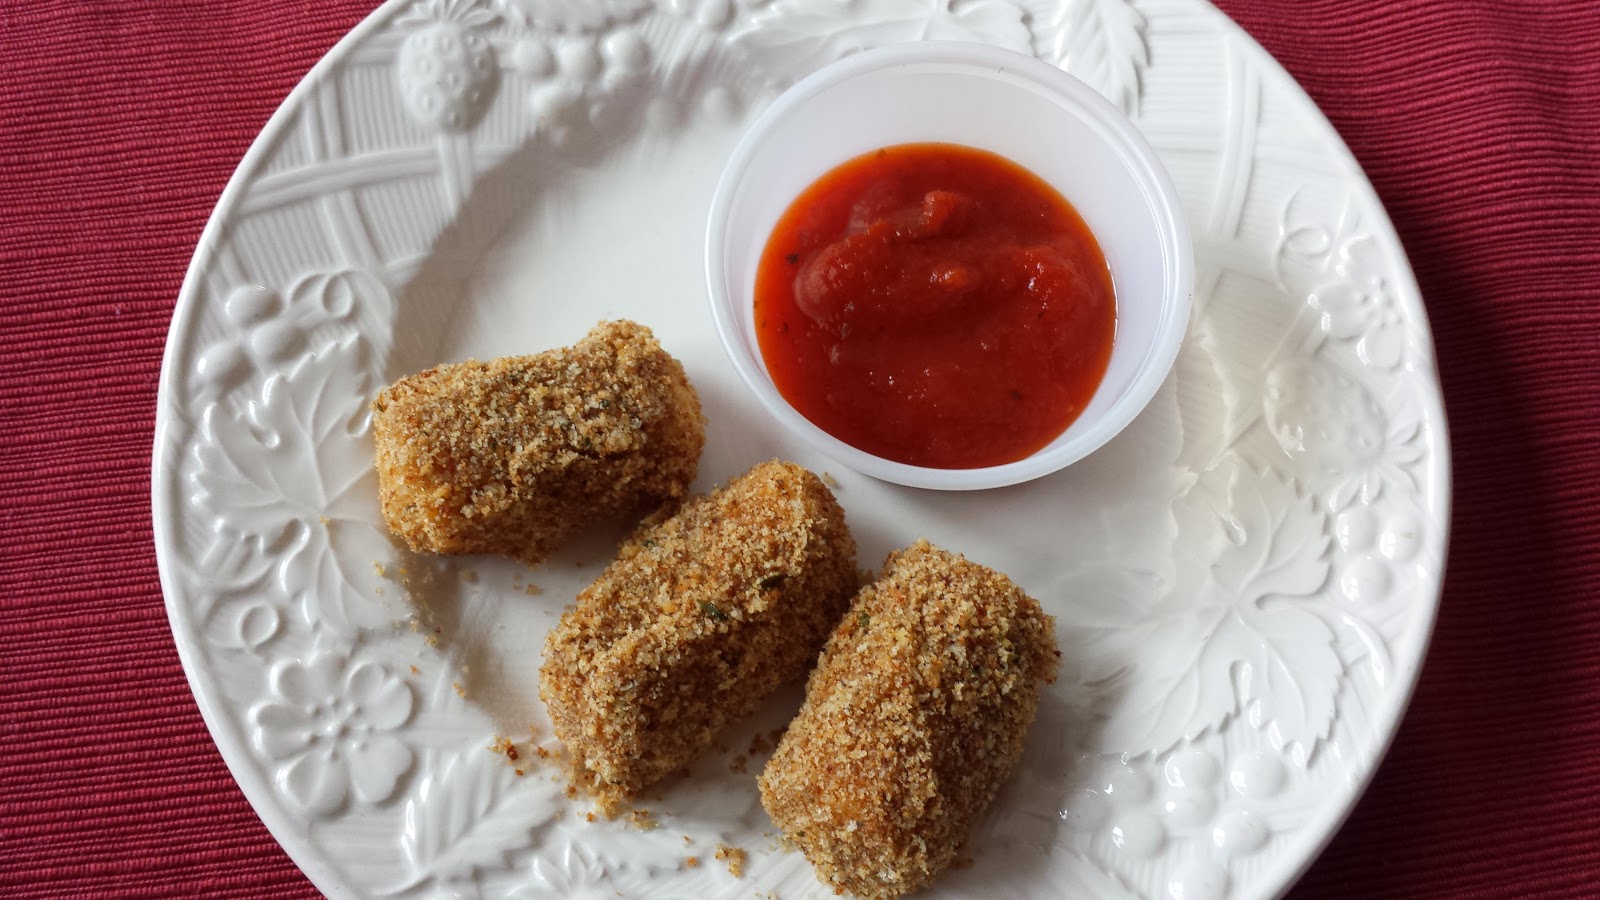
I recently saw a recipe for baked  mozzarella sticks and decided to try it.  Who doesn't love melted cheese? This is a great appetizer for drop in guests or a satisfying snack when you get a little hungry during a "Polar Vortex". This recipe can be made low fat and gluten free. Feel free to experiment with your favorite crumbs and spices.


These three ingredients plus an egg.  It does not get easier than that.

Mix the bread crumbs with the oil and place in a 350F oven for 5-10 minutes to brown.  Stir occasionally.  This crisps the bread crumbs and will make the outside of the cheese brown and crispy.

Cut the string cheese into thirds.
Dip in beaten egg and roll in bread crumbs to cover; repeat.
Place on foil lined baking sheet and bake 10-15 minutes.
Serve with warm marinara sauce. Yum!

Baked Mozzarella Bites

6 string cheese sticks (unwrapped and cut into thirds)
1 cup of Italian bread crumbs
1 Tablespoon canola or olive oil
1 egg beaten
1/2 cup of marinara sauce

Mix bread crumbs and oil in a small oven proof dish.  Bake for 5-10 minutes at 350F until brown, stir occasionally. Dip pieces of cheese into beaten egg, coat with bread crumbs; repeat.  Place on foil lined baking sheet.  Repeat with remaining cheese.  Bake for 10-15 minutes at 350F.  Serve with warm marinara sauce for dipping.

*Can be prepared ahead and refrigerated on baking sheet until ready to bake.
*Low fat string cheese can be substituted


Tuesday, June 4, 2013

Plans

I had big plans to post low carb recipes, tell you about my natural weed killer, or natural weed preventer.  The truth is I have not had much time to do anything.  It is the end of the school year, which means endless band concerts, programs, meetings and finding the perfect care giver for your children during summer break.  Then add a daughter's birthday, a shopping excursion to find clothing and shoes for your daughters that have outgrown everything, a trip out of town for the holiday and meeting with an attorney to establish guardianship for a failing parent and you wonder how you even had time to take care of the basics of food, laundry, career and sleep.  The food I have prepared over the last few weeks has been simple fresh, raw or steamed vegetables, simple grilled meats or I have placed a carryout order for pizza.  You don't need a recipe for that.  I made a natural weed killer with Dawn Dish Soap, vinegar and salt and sprayed it on some problems areas and then we had torrential thunderstorms for five days.  My natural weed preventer is corn meal sprinkled on the ground of my garden, think of it as weed birth control, but after the four plus inches of rain and tropical humidity I probably have created Polenta in my garden. I will try these items again and update you soon.  I can see the light at the end of the tunnel, but I just hope it is not a train.

Wednesday, May 8, 2013

Living Low-Carb in a High-Carb World

I started following a low-carb diet with a friend last week, because the weather finally warmed up and I can no longer hide under winter clothing.  It is amazing how many carbohydrates I consumed on a daily basis. I am a carbohydrate addict that loves crusty bread and fruit. The good news is that I feel great following this diet, energy is abundant, I do not feel hungry and I am down 9 pounds. My mood is improved and I am finally able to consume half my body weight in ounces of water. The bad news is that I miss the bun for my burger, pasta and bread, pizza, unlimited fruit and alcohol. Why can't someone develop a low-carb pizza that tastes great?  We can put a man on the moon, but can't get the low-carb thing down? Living low-carb, while observing the unrestricted carbs of others is not fun. I did partake in carbs over the weekend (pizza and beer), because my willpower could not handle the sight and smell. My diet has been pretty basic protein and leafy greens for the past 9 days, but now I am ready to experiment with some recipes to cure the deprivation.  I have been searching the Internet and trying to come up with some of my own.  I expect to post some recipes soon.  Meanwhile enjoy my low-carb snack ideas that have helped keep my sanity.

Low Carb Snacks Ideas

Hummus served with cucumbers and celery
Broccoli slaw mixed with tuna and Italian dressing
Plain Greek yogurt sprinkled with cinnamon and almonds
Peanut Butter (no sugar added) and celery
String cheese
Tomato and Mozzarella Salad
Spinach or Artichoke Dip served with celery, cauliflower, broccoli and cucumbers


Wednesday, April 24, 2013

Joining the Sandwich Generation

Yes, I have officially joined the "Sandwich Generation".  You do not receive a membership card, but you have the joy of caring for your young children and aging parents, while trying to have a career.  Who knew I would be making orthodontist appointments and seeking advice from attorneys that specialize in elder care at the same time?  I was not expecting it.  If you have been following my blog, you are aware that my 68 year old Mother has some medical issues.  I am able to report that after over four years of pleading with physicians for answers we are finally being pushed toward a diagnosis of frontotemporal dementia, because everything else has been ruled out.  Sadly my family has witnessed Mom's personality fading over the past 4 years.  Behavioral changes and personality changes caused us to seek answers. Mom has evolved from an extremely independent, outgoing individual who was involved socially in groups and activities to a withdrawn individual who is apathetic and lacks initiative to complete daily living tasks and lacks judgement to make decisions. There is no cure for frontotemporal dementia and progression can not be slowed. Frontotemporal dementia differs from Alzheimer's disease, as there is no true memory loss in the early stages of the disease, but instead changes in the personality, social skills, ability to concentrate and reasoning. These changes in personality are what make this disease so challenging and difficult.  Although my Mom has not been physically lost, emotionally and socially we will never enjoy the same connection and I mourn this loss.  I miss the hour long conversations about nothing, which Mom and I had almost daily, but I am enjoying my developing relationship with my Dad during this latest chapter in our lives.

Saturday, April 13, 2013

Using Leftover Candy


I do not want to mislead you, but typically my household does not have leftover candy.  This Easter my Mom who has memory issues forgot that she had purchased candy for her granddaughters and purchased about triple the amount  she would normally give.  Grandma then gifted all of this candy, which I am guessing weighed about 15 pounds.  I love my dentist, but do not feel that I should completely fund her retirement.  I have hidden some of the candy, but wanted to use some of the candy.  My inspiration came from those Two Bite Brownies that are sold in the store.  We had about 3lbs of Hershey's Kisses so I decided to combine Peanut Blossom Cookies and Two Bite Brownies and came up with Chocolate Peanut Butter Tarts.  My motto is "cook once eat twice" so I doubled the recipe and made 8 1/2 dozen cookies in less than one hour, including prep, bake time and clean up. No one has time to be in the kitchen, so why not make the most of your time. Store a couple dozen in the freezer for later.


 This recipe is a great time saver because there is no shaping the dough into balls and the cookies are baked in the muffin tins, so if you have a few tins you can bake many cookies at once.


Place an upside down Hershey's Kiss in the center of each cookie, after 8 minutes of baking.  Then return the pans to the oven for 1 minute so the chocolate gets all melty and delicious.

Chocolate Peanut Butter Tarts

Makes about 4 dozen

1/2 C shortening
1/2 C peanut butter
1/2 C granulated sugar
1/2 C packed brown sugar
1 egg
2 T milk
1 t vanilla
1 3/4 C flour
1/2 t salt
1 t baking soda
1 bag of Hershey's Kisses (unwrapped)

Cream shortening and peanut butter.  Gradually and sugar; cream well.  Add egg, milk and vanilla; beat well.  Add dry ingredients gradually into creamed mixture. Using small cookies scoop (2 teaspoon size), place dough into mini muffin tins.  Bake for 8 minutes.  Remove from oven; press an upside down Kiss into each of the cookies; return to the oven for 1 minute. Remove from the oven and let cool until cookie is set. Remove cookies from tins and cool on wire racks.  Cookies are easier to remove if edge is golden brown. 

Saturday, April 6, 2013

DIY Dryer Sheets

I started a new job two weeks ago and although it is great to be back, I am still adjusting to the schedule.  One of the problem areas is laundry, not that it was running perfectly before the new job.  My laundry room is know as the laundry dungeon.  Yes, it is in the basement and it's best feature is the laundry chute.  Actually, I do not think I would  ever want a first floor laundry.  Where would I hide all the dirty laundry and clothing that was hanging dry?   If you can make it through the laundry room that is piled with clothes, you will see the dryer. This is what the top of the dryer usually looks like.

 Most of the items were found in the dryer, money, Barbie clothing and Barbie shoes, unknown objects, stain removal guide, dryer lint (I am saving it for the fire starters), detergent, the Downey Fabric Softener Ball (that I always forget to put into the washer) and other laundry items.   I am currently out of dryer sheets.  Imagine my delight when I found something online for DIY dryer sheets that are reusable.


 Pour a cap full of liquid fabric softener into a bowl or rimmed plate.

 Take an old wash cloth and soak up the fabric softener.


Make sure the entire cloth is at least damp with fabric softener, but not dripping.

Hang until dry.


Add the dryer sheet to the dryer with the clean laundry.  It will last for several loads.  I recommend having several of these DIY Dryer Sheets on hand to store on top of your dryer with the other treasures..

Friday, March 29, 2013

Perfect Hard Boiled Eggs

It's almost Easter and nothing is more unappetizing than over cooked hard boiled eggs or undercooked hard boiled eggs.  You know what I'm talking about, that greenish, gray tinted egg yolk in an overcooked egg or the dark, wet looking yolk in an undercooked egg.  YUCK!  Why not trying cooking them the proper way?

Add just enough water to cover your eggs and place on the burner of your stove on high heat.
When the water is boiling, turn off the heat on the stove.
Cover the pan and let sit on the burner.

Wait 15 minutes.
Place the  pan in sink and turn on the cold water, fill the pan with cold water until the water in the pan feels cold to the touch.

Let the eggs sit in the cold water for 5-10 minutes.  Remove the eggs.
You will get a perfect, dry, fluffy yolk every time. 

Now you have the perfect hard boiled eggs for eating or for your recipes.


Thursday, March 21, 2013

Waste Not Want Not

Many people like to save money and stock up when they find a sale.  However, if you find yourself throwing out food from your refrigerator every week you probably are wasting money instead of saving money.

Here are some scary statistics from the National Resource Defense Council:
- About 40 percent of all food in the U.S. goes to waste.
- The average American wastes about $28 to $43 in food each month, roughly 20 pounds of food.
- Broken down, about 17 percent of dairy, 20 percent of vegetables, 15 percent of fruit, 18 percent of the grains, 25 percent of seafood, and 33 percent of the meat you buy goes to waste.

You may be interested in some food storage tips to make your food last longer and have less waste.  Some of these tips have worked for me and the others I am still in the process of trying.  These tips are typically a few minutes of prep work and storage on shopping days, it may require you to plan ahead.


1. Wrap celery in foil
My celery used to  turn soft in a matter of days before I started wrapping it  in foil.  Now I can actually use all of my celery up to 2 1/2 weeks later and it is still crisp.

After 2 1/2 weeks.

2. Use paper towels to preserve asparagus.
Fresh asparagus dries out if it is not stored properly.  Wash your asparagus and wrap in paper towels.  This will keep the asparagus for a couple of days and allow it to stay crisp.

3.  Wash fruits and vegetables in a vinegar bath.
When arriving home from the market, fill the sink with water and 3/4 cup white vinegar.  Soak the produce for 10 minutes before storing.  The vinegar will remove dirt, wax and bacteria.  This works marvelously on fresh berries.

4.  Store onions in pantyhose.
Put an onion in the foot of a clean pair of pantyhose or tights, seal it off with a twist tie, add another onion and repeat until the hose are filled.  This allows the onion to breathe and they should last for a month or more.

5.   Add rice to your seasonings.
This is important in high humidity regions.  Dry seasonings tend to clump in humid areas.  Add 4-10 grains of rice to a bottle and shake.  The rice keeps the seasonings from sticking together and will last for 6 months or more. Especially good for seasonings that contain salt.

6.  Invest in airtight plastic containers.
I store cereal, chips, crackers and grains in airtight containers to keep them from going stale.

7.  Store bread in the freezer or refrigerator.
Bread tends to mold quickly when the weather is warm and humid.  Bread will last up to two weeks stored in the refrigerator.

8.  Keep fresh herbs in a plastic bag.
Wash and dry the herbs, place on a paper towel in a plastic bag and seal the bag.  The herbs will last about a week.

9.  Keep an eye out for bad apples.
If one apple spoils it quickly spreads to the other apples or fruit.  Keep the ripest fruit in a separate bowl.

10.  Utilize your freezer.
Some fruits and vegetable can be frozen if you will not be able to use them before they spoil.  Peppers and onions can be chopped or sliced and frozen in freezer bags for use in cooked recipes. Zucchini can be grated and frozen in bags for use in bread, muffins or pasta sauce. Berries and peaches can be frozen and used in baking and smoothies. Eggs can be cracked, whisked and frozen in ice cube trays to be thawed and used later.  Milk freezes well.  Pour about a cup of milk out of a full gallon to allow for expansion during freezing.  Grate cheese and freeze in bags for a later use.

Hopefully these tips will help keep more money in your pocket or give you more money to be spent on fun things, like shoes.


Saturday, March 16, 2013

March Madness

It has been a really busy week around here.  I make custom cakes and had three orders this week, which I managed to fit in between work and appointments.  This was one of the cakes for a baby shower.  It is the Baby Bump Cake.


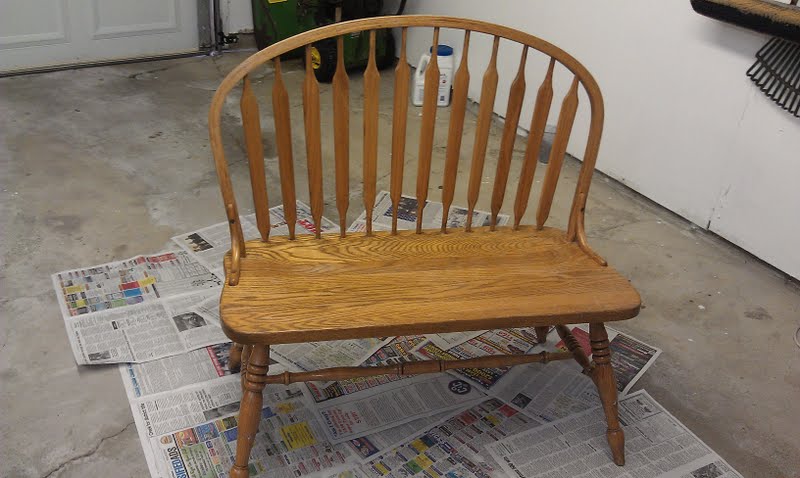
My sister-in-law was throwing this oak bench out, so I took it off her hands.  I thought it would look great at my kitchen table after a little updating and some TLC.


I was able to paint it during our brief warm weather.  Now I have some extra seating, for the price of $7 for the glossy black spray paint.  

Now we have the problem of children fighting over who sits on the bench, even though it seats two.


Wednesday, March 6, 2013

Waterlogged


"Water is the only drink for a wise man."  - Henry David Thoreau


I am jumping aboard the "health wagon".  It is March, but most of the people who started in January have fallen off the wagon to make room for me.  The experts all say it is never to late to start a good habit.   I have chosen to start drinking more water.  I drink water and rarely drink soda, but I find it very difficult to drink the required 8 glasses a day.  As if drinking the minimum was not difficult enough, I had to find an online calculator that takes your weight, activity level and climate into consideration.  After completing the questionnaire and finding my desired water intake for maximum health, you will probably be able to find me in the nearest restroom.  I am going to try to meet my goal.  I have started adding frozen fruit to the water to infuse it with flavor. The fruit does give the water a little flavor.   Hopefully, I don't swallow a berry and choke.  Then there is the cold vs. hot debate, does drinking cold water burn more calories than warm or hot water?  Don't forget that you are supposed to drink only filtered water, which gets my brain thinking.
  1. I grew up with an artesian well in my backyard, which spewed out delicious, cold water year round, which I drank, unfiltered.
  2. I drank well water for the first 24 years of my life, which probably contained chemical contaminants, due to the surrounding farms.
  3. As a child, I also drank from a garden hose, which probably contained lead.
There are so many issues with water.  Then I started thinking about my water bottle.

  1.  Glass is not an option for on the go, and I will have to be drinking non-stop or have an IV inserted to get my fluids. 
  2. You are not supposed to drink from plastic, because of BPA and it's link to cancer. 
  3. Aluminum is bad, because if it is not lined the metal will leach and affect the taste of the water and the possible link to Alzheimer's Disease. If your bottle is lined, you are back to the BPA problem.
  4. Stainless is supposed to be the bottle of choice, so it looks like I will be off to find a new bottle . 
I think all of these issues have kept me from drinking my water.  Perhaps there would be fewer issues if I drank more wine.


Friday, March 1, 2013

Banana Peel Teeth Whitener

Life was so boring before the invention of the Internet and Pinterest.  I can not remember what I used to do to pass the time.  Imagine my delight when a friend posted this beauty tip.


I like white teeth, but teeth whitening can be a bit pricey if you purchase trays from your dentist or buy the strips. Allegedly, the minerals in the banana peel (potassium, magnesium and manganese) absorb into your teeth and whiten them.  You can be the judge, but I do notice a difference after one banana application.


1.  Rub the inside of the banana peel onto your teeth for 2 minutes.
2. Brush your teeth.  It is that simple.

 
BEFORE
AFTER

I am predicting a banana shortage in the near future.  Don't say I didn't warn you!

Thursday, February 28, 2013

Listerine and Shaving Cream Foot Treatment

In case you did not know, I love finding new uses for everyday products that are in my home.  I found this on Pinterest about treating dry, cracked feet http://www.ksl.com/?nid=1009&sid=17218013 . I had to try this.  My February feet are a fright.  Sandal season is around the corner (even though it is currently snowing) and my feet were so bad I was embarrassed to get a pedicure.  I will spare you the before photo, because I value my readers and do not want you to stop visiting my blog.  :) 


The two magic ingredients Listerine and shaving cream.  I know it is hard to believe.


1.  Combine equal parts of Listerine and water (I used 1 cup of each) and pour over a hand towel in a wash basin.
2.  Rub the shaving cream onto your feet. Wrap your feet in the towel.

Notice my legs are about the same shade as the hand towel.  My husband pointed this out to me.

3.  Sit with feet wrapped for 30 minutes.  Your feet will feel warm and tingly.
4.  Unwrap feet and rub off shaving cream with the towel.  Apply lotion.   

My feet were so soft and felt incredible.  I have purchased many lotions and potions over the years and the results did not even come close to this treatment.  I think I may make this a weekly event.

Sunday, February 24, 2013

Making Yogurt in a Crockpot


I don't want you to think I have turned into a Birkenstock wearing, hemp loving hippie freak, but I was intrigued by something I saw while reading an article claiming "new ways to save $400 a month".  Making your own yogurt can save you money.  Never saw that one coming! 

Reading about making my own yogurt repulsed me.  Why would I willingly grow bacteria in my kitchen, in a rather large petri dish?  Why would I let food sit on my counter for over 8 hours at room temperature and then voluntarily eat it?  Why?  Maybe I needed some adventure in my life.  I had an extra half gallon of milk in the refrigerator calling my name.  It sounded like a win win situation, yogurt so delicious and I could save money.  The worse case scenario would be me admitted to the hospital a victim of self-inflicted food poisoning. 

Like many people, I am a fan of Greek style yogurt.  In case you are not aware, "Greek Style" yogurt is nothing more than regular yogurt that has been strained to remove the whey (liquid).  Are you shocked that the "Greek " yogurt that retails for up to $1.50 per 6 ounce container is actually regular yogurt in disguise?  Yes, I had been a victim of the trickery.  I researched a couple of recipes and I made yogurt at home.  It was delicious.  I am alive and did not become a food poisoning victim.  My 9 year old/ food critic said "This yogurt tastes better than the yogurt from the store".  "Can you make strawberry yogurt"?  Looks like I will be making yogurt often. Yogurt making is not labor intensive, but it is time consuming.  I would recommend making yogurt when you will be home all day.  This recipe  http://moneysavingmom.com/2012/06/homemade-yogurt-in-the-crock-pot.html was used as a guide. I did make some changes. The cost per 6 ounce serving came to $0.28 on this vanilla yogurt. 

Pour a half gallon of milk into your crock pot.  I used 1/2 percent milk.  Turn your crock pot on high and heat the milk until it reaches 180F.  Depending on your crock pot this could take 2-3 hours. 

I recommend using a thermometer to get a precise temperature. 

When the milk reaches 180F, it will start to look foamy.  Remove the crock from the heating element and cool at room temperature to 120F.  Leave the crock pot on for now.

I decided to make vanilla yogurt sweetened with agave nectar.  The yogurt is used for the active and live cultures.
Make sure your yogurt has live and active cultures listed.

Mix 1 cup of the 120F milk with the vanilla, agave nectar and yogurt.

Pour the yogurt mixture into the milk and stir.  Place the crock back into the heating element.

Unplug your crock pot and wrap it in a blank or large beach towel to keep it warm.

Keep the wrapped crock pot in a draft free location for 8-12 hours.  Yes, on the counter and unrefrigerated. I went out for the evening.
This is what I found at 1:45am, when I returned home. You can refrigerate at this time for regular yogurt.

Line a strainer with cheesecloth, coffee filters, or thick paper towels and place over a bowl. Pour in the yogurt and place in the refrigerator.

This is what my yogurt looked like after 6 hours.  Remove from the strainer and place in a storage container.  Discard the whey (liquid).
Very thick and creamy.
Individual serving size.


Crock Pot Yogurt

1/2 gallon of milk (I used 1/2 percent)
1 6-ounce container of plain yogurt with live and active cultures (I used plain fat free)
3 teaspoons vanilla
1/4 -1/3 cup agave nectar (I used 1/4 cup)

Pour milk into crock pot and heat to 180F.  This make take 2-3 hours.  Remove crock and let milk cool to 120F.  Mix yogurt, vanilla, and agave nectar in large measuring cup.  Add 1 cup of 120F milk to yogurt mixture and mix together.  Return mixture to crock pot.  Turn off crock pot and unplug.  Wrap crock pot in blanket and let sit in draft free area for 8-12 hours.  Unwrap and refrigerate.  Will keep for up to 2 weeks.

*For Greek yogurt:  Place yogurt in cheese cloth lined strainer placed on a bowl.  Cover with plastic wrap and place in the refrigerator.  Remove from strainer after 6 hours and place in storage container.